User management
Feature availability
Inviting team members to collaborate is available as part of certain payment plans. Plan details can be found on our pricing page
Invite a user
- In the dashboard, navigate to the user management tab
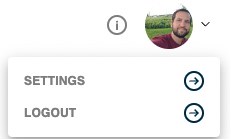
- Go to "SETTINGS" (click on the avatar in the upper-right corner)
- Click on the "USER MANAGEMENT" tab, then click "Invite User"
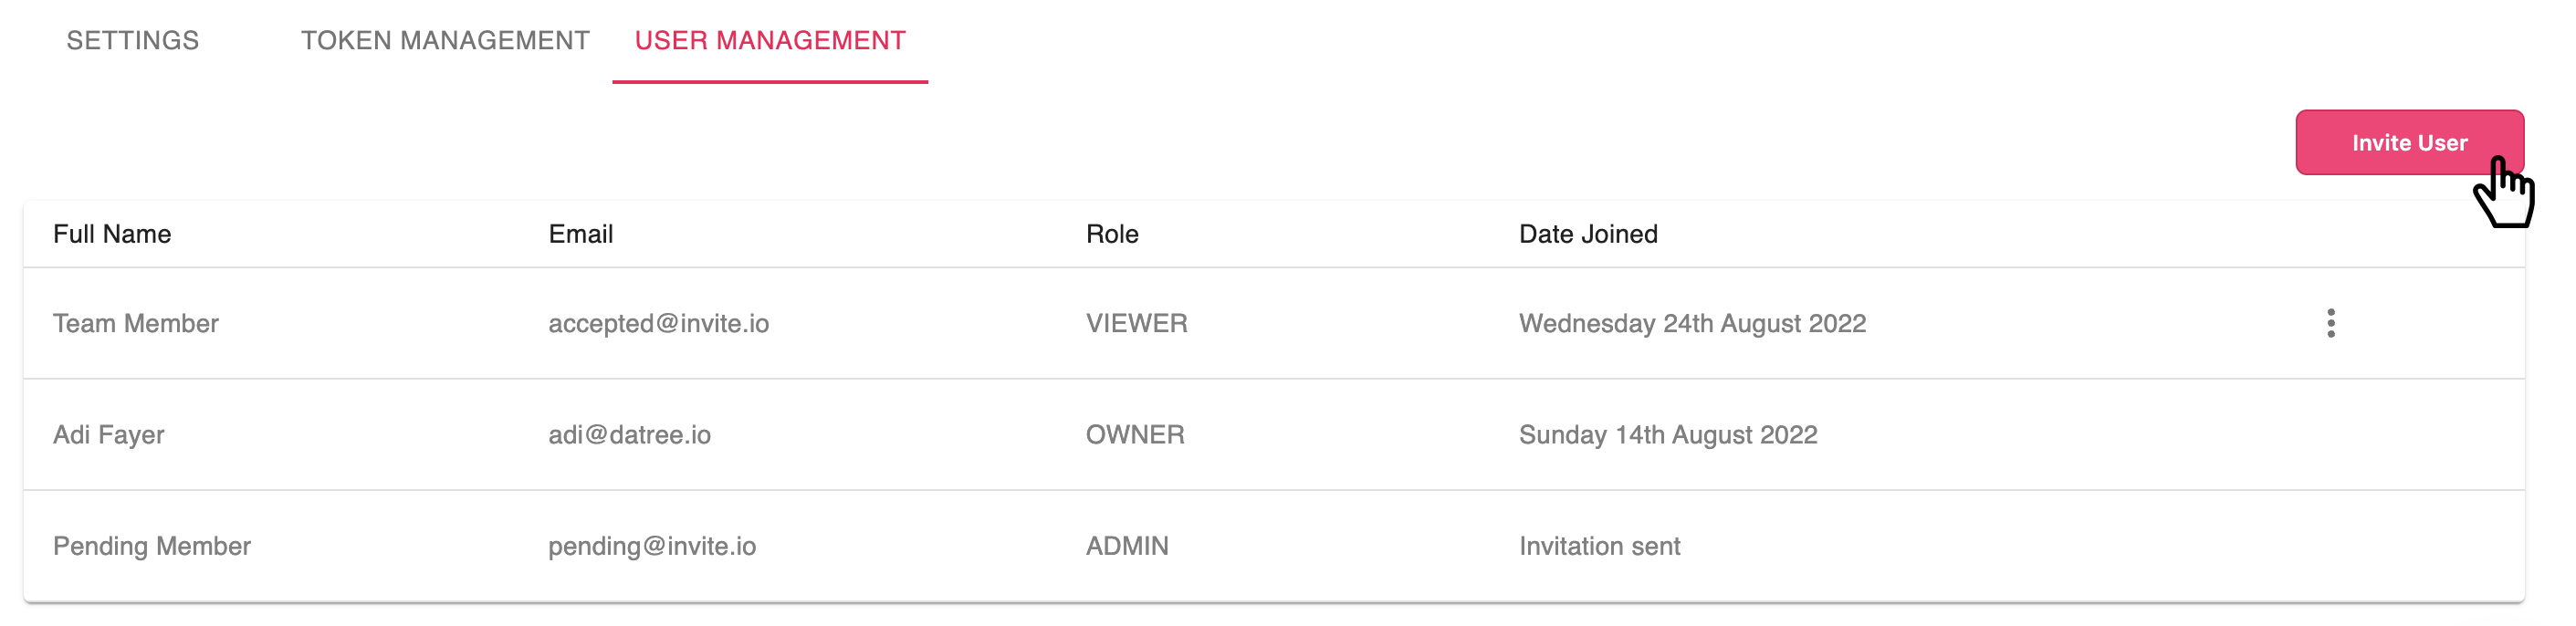
- Insert the user’s email address and the desired permission (role)
- Once the invitation is successfully sent, the token of the newly invited user will be displayed in the dashboard and can be shared with the new workspace members
- The token is used to connect the CLI with the dashboard to determine the available policies and report policy check results to the dashboard
- The newly invited user is added to the users’ table, where you can also track his/her invitation status (pending/accepted)
Edit user roles
- In the dashboard, navigate to the user management tab
- Click on the "..." icon displayed for each member
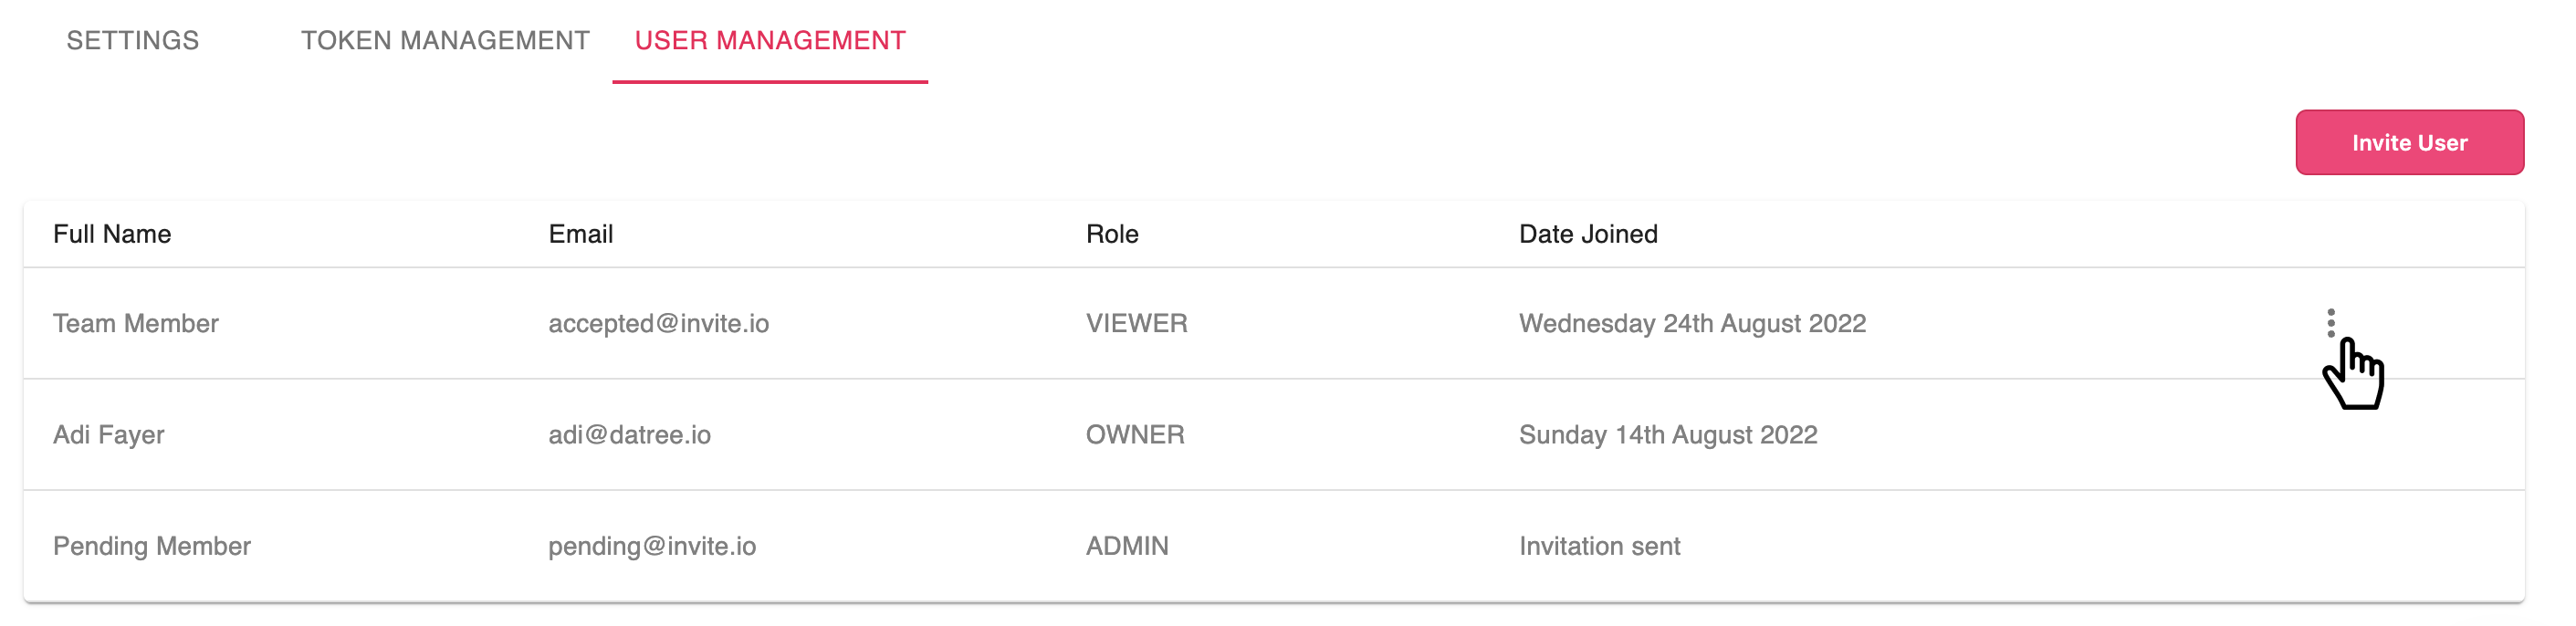
- Click on "Edit"
- Select the new role and save the change
Invitation expired
If an invitation to join a workspace has reached it expiration date, you can re-invite the user by clicking on the "invite user" button and providing the desired email and permission.
User roles
There are 3 levels of permissions, defined by the user’s role:
- Owner
- Admin
- Viewer
Roles Permissions
| Function | Owner | Admin | Viewer |
|---|---|---|---|
| Create/delete policies | V | V | |
| Edit policies (toggle rules on/off) | V | V | |
| Create cusotm rules | V | V | |
| Execute workspace policies | V | V | V |
| Create/delete/copy tokens | V | V | |
| Access policy check history | V | V | V |
| Edit/delete workspace members | V | V | |
| Toggle Policy-As-Code | V | V | |
| Change default K8s schema version | V | V | |
| Invite new members | V | V | |
| Delete workspace | V | ||
| Update/cancel plan subscription | V | V | |
| Create custom policies | V | V | |
| Update Email subscription frequency | V | V | |
| Edit rules’ fail suggestion text | V | V |